GCSE Tutoring Programme
Our chosen students improved 1.19 of a grade on average - 0.45 more than those who didn't have the tutoring.
In order to access this I need to be confident with:
2D shapes Types of quadrilaterals 3D shapes Faces, edges and vertices Polygons Decimals Arithmetic Simplifying expressionsThis topic is relevant for:

Plans And Elevations
Here we will learn about plans and elevations, including what they are, how to construct them and how to interpret plans and elevations to generate a 3 D image.
There are also plans and elevations worksheets based on Edexcel, AQA and OCR exam questions, along with further guidance on where to go next if you’re still stuck.
What are plans and elevations?
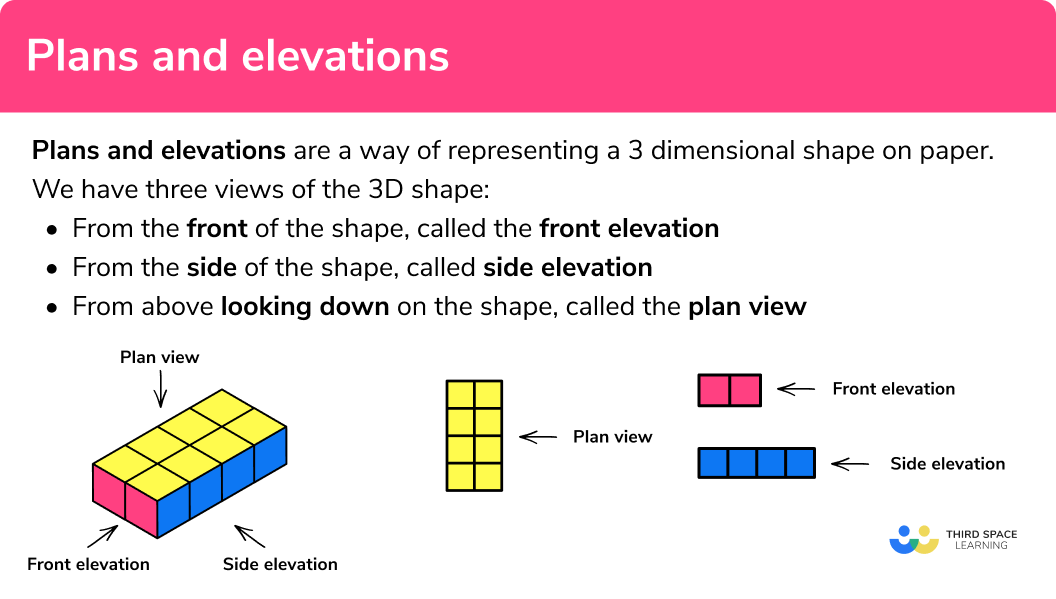
Plans and elevations are a way of representing a 3 -dimensional object.
We have three views of the 3 D shape:
- From the front of the shape, called the front elevation
- From the side of the shape, called side elevation
- From above looking down on the shape, called the plan view
What are plans and elevations?

How to construct plans and elevations
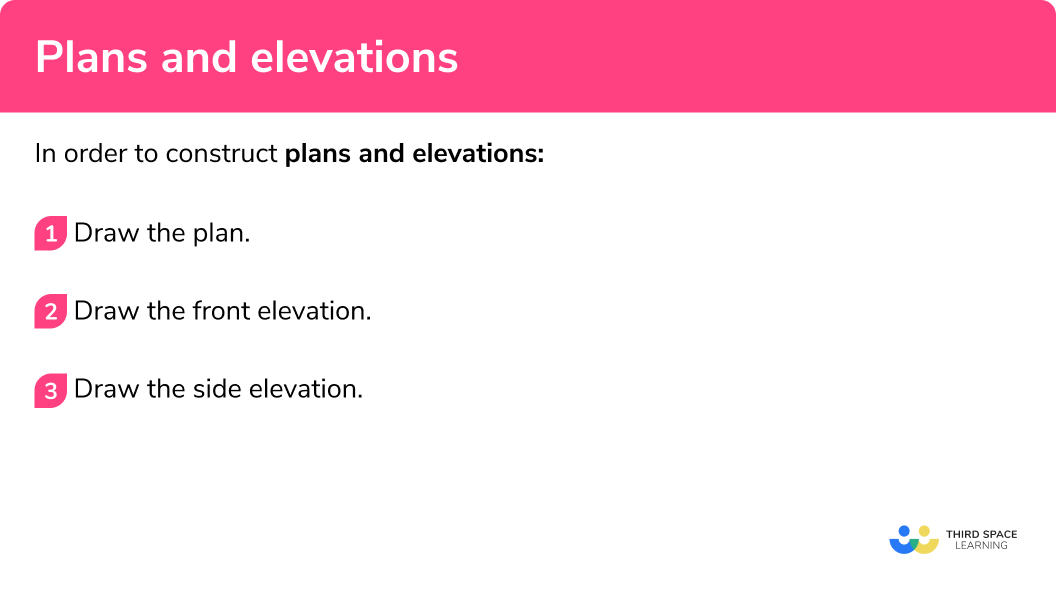
In order to construct plans and elevations:
- Draw the plan view.
- Draw the front elevation.
- Draw the side elevation.
How to construct plans and elevations


Plans and elevations worksheet

Get your free plans and elevations worksheet of 20+ questions and answers. Includes reasoning and applied questions.
DOWNLOAD FREE
Plans and elevations worksheet

Get your free plans and elevations worksheet of 20+ questions and answers. Includes reasoning and applied questions.
DOWNLOAD FREERelated lessons on 3D shapes
Plans and elevations is part of our series of lessons to support revision on 3D shapes. You may find it helpful to start with the main 3D shapes lesson for a summary of what to expect, or use the step by step guides below for further detail on individual topics. Other lessons in this series include:
Plans and elevations examples
Example 1: simple object made from cubes
Draw the three types of elevation for this object.
- Draw the plan view.
Imagine you are above the shape and looking straight down.
We would see two yellow squares next to each other, even though the cubes are different heights.
2Draw the front elevation.
Imagine you are in front of the shape and looking straight at it. We would see a red ‘L’ shape.
3Draw the side elevation.
Imagine you are at the side of the shape and looking straight at it. We would see 2 blue squares making a rectangle, even though the cubes are at different distances.
Solution:
Example 2: simple shapes made from cubes
Draw the three types of elevation for this object.
Imagine you are above the shape and looking straight down.
We would see two yellow squares next to each other, even though the cubes are at different heights.
Imagine you are in front of the shape and looking straight at it.
We would see a red ‘L’ shape.
Imagine you are at the side of the shape and looking straight at it.
We would see 3 blue squares making a rectangle.
Solution:
Example 3: cuboid
Draw the three types of elevation for this cuboid.
Imagine you are above the shape and looking straight down. We would see a yellow rectangle that is 3 squares wide, and 4 squares in length.
Imagine you are in front of the shape and looking straight at it. We would see a 2 by 3 red rectangle.
Imagine you are at the side of the shape and looking straight at it. We would see a 2 by 4 blue rectangle.
Solution:
Step-by-step guide: Cuboid
Using plans to construct the 3D object
You need to be able to visualise the 3 D object using plans and elevations.
It is useful to recognise features within the 2 D drawings such as:
- single squares,
- the number of squares in a row,
- capital letter shapes (L, T, C shapes)
Below are a few examples using these features. Note, they are not the plans and elevations of the same object.
| This plan looks like a capital L. | This plan has a random square that is not in line with the other squares. | This plan looks like a C shape | This plan has 4 squares in a row. |
Remember that these plans and elevations may not be flat surfaces. These two 3 D shapes below have the same plan view, but they are not the same 3 D object.
Top tip: To determine the 3 D object from the plans, you must use all three plans and elevations.
How to construct the 3 D object using the plans
In order to construct the 3 D object from the three elevations:
- Inspect the plan view.
- Inspect the front elevation.
- Inspect the side elevation.
- Draw the \bf{3} D object.
Constructing a 3 D object examples
Example 4: constructing a simple 3 D object
A 3 D object is made from 4 identical cubes. Construct the 3 D object using the three elevations of the object given below.
The plan view has three yellow squares in a row, with one square on the right hand side of the middle square.
The front elevation is two squares wide. This means that the 3 D image is only one cube high.
The side elevation is three squares wide. The middle square must not be in line with the other two squares as the front view shows the 3 D object being two squares wide, and the plan view shows that it is the middle square that is not in line.
Example 5: more cubes
Below are the plans and elevations of a 3 D object. Given that the object is made up of 6 congruent cubes, construct an isometric drawing of the 3 D object.
The plan view has three yellow squares in a row, with one square on the right hand side of the bottom square.
The front elevation is two squares wide and 3 squares high (the same as the plan view). This means that the 3 D object must be 3 cubes high, 3 cubes deep, and 2 cubes wide.
The side elevation confirms that the shape is 3 cubes high and 3 cubes deep. From the front elevation and plan view, the square in the bottom left hand corner must not be in line with the other squares.
Example 6: alcoves
The following plans and elevations represent a 3 D object consisting of 10 identical cubes. Construct the 3 D object using isometric paper.
The plan view consists of four yellow squares in a 2 \times 2 grid. We cannot yet determine if these squares are on the same surface.
The front elevation is 3 squares high and 2 squares wide. Given that the plan view is a 2 \times 2 grid, at least one row of two squares must not be in line with the others.
The side elevation looks like a capital C. This means that we have an alcove (a recess) in the centre of the front elevation.
The top and bottom rows of the front elevation must be in line with each other, but not with the middle row.
Common misconceptions
- Elevations
The front elevation and the side elevation can be labelled the other way around. If the diagram has one arrow – then this is the front elevation.
- \bf{3} D cubes and cuboids
A 2 D drawing of a cube using isometric paper uses 60^o and 120^o angles. But the cube has 90^o angles, as do the plans and elevations. A large proportion of plans and elevations are based on squares and rectangles.
- Rectangles are acceptable in place of individual squares
If you are drawing the plan and elevation of a cuboid, it is acceptable to draw rectangles to show the sides with the correct dimensions, rather than lots of individual squares. For example,
Practice plans and elevations questions
1. The following object is a cuboid with the dimensions 2cm \times 3cm \times 6cm. The cuboid is made from 36 identical cubes. Which diagram shows the plan view of the 3 D object? The front elevation (F) has been labelled.


The plan view is overhead. We can see that it is a rectangle that is 2 squares wide and 6 squares in length.
2. The 3 D object below is made from 10 identical cubes. Which of the following is the side elevation of the 3 D object?


As the front elevation is looking at the object from the left for this question, the side elevation will be made from looking at the object from the right. We would see 4 blue squares making a vertical line, then add the additional two squares at the left of the drawing from the second row.
3. The following 3 D object is constructed using 7 identical cubes. Construct the side elevation of the object.


From the side view, we can see three squares in line, with one square to the left on the bottom row.
4. Which of the objects below has the following plan view, front elevation, and side elevation.?
| Plan view | Front elevation | Side elevation |


The plan view is a 2 \times 3 rectangle, the front elevation is a 3 \times 2 rectangle, and the side elevation is a 3 \times 3 square.
5. Which of the objects corresponds to the plan and elevations?
| Plan view | Front elevation | Side elevation |


The plan view is a 2\times 5 rectangle. The front view is a 2 \times 3 rectangle, and the side view is a 5 \times 3 rectangle.
6. Which of the objects corresponds to the plan and elevations?
| Plan view | Front elevation | Side elevation |


The object is mostly only one cube high, with only one additional cube of the second layer, in the middle column.
Plans and elevations GCSE questions
1. The plan view, front elevation and side elevation of a solid are shown.
Which of these solids corresponds to the views?
Cuboid Cylinder Cone Sphere
(1 mark)
Cylinder
(1)
2. The plan view, front elevation and side elevation of a solid are shown.
| Plan view | Front elevation | Side elevation |
How many cubes are used to make the solid?
8 \text{ cubes} \quad \quad 10 \text{ cubes} \quad \quad 12 \text{ cubes} \quad \quad 14 \text{ cubes}
(1 mark)
(1)
3. The diagram shows a cuboid.
On the centimeter grid below draw accurately the plan of the cuboid.
(2 marks)
For a rectangle
(1)
For the correct rectangle – 7 \ cm by 2 \ cm
(1)
4. The diagram shows a prism with a cross section in the shape of a pentagon.
On the centimetre grid below draw the front elevation and the side elevation.
(4 marks)
For the front elevation – square 3 by 3
(1)
For the front elevation – line across, splitting into 2 rectangles
(1)
For the side elevation – a pentagon with base 3 and height 3
(1)
For side elevation – correct pentagon
(1)
Learning checklist
You have now learned how to:
The next lessons are
Still stuck?
Prepare your KS4 students for maths GCSEs success with Third Space Learning. Weekly online one to one GCSE maths revision lessons delivered by expert maths tutors.

Find out more about our GCSE maths tuition programme.