

Scaffolding In Education: The Strategies That Work, And How To Know When To Take Them Away

Scaffolding in education is easy to put up and surprisingly hard to take down. Knowing which strategies a child actually needs – and when to start removing your support – is what turns scaffolding into independent learning rather than quiet dependence. After more than a decade designing one-to-one maths lessons, and over 2.1 million of them delivered, it is a question my team and I have wrestled with more than almost any other.
When we built Skye, our AI maths tutor, we couldn’t fall back on a teacher’s instinct in the room to decide when to step in and when to step back. We had to make every one of those scaffolding decisions explicit and build them into the lessons themselves.
That forced us to get precise about something most teachers do on autopilot. In this guide I’ll walk you through what scaffolding in education is, the scaffolding strategies that help students learn, and the part teachers find hardest: knowing when to take the support away. I’ll show you how we’ve built each idea into Skye as we go, with examples you could take straight into a CPD session with your team.
What is scaffolding in education?
Scaffolding in education is the temporary support a teacher gives students so they can manage a task or grasp a concept they could not yet handle on their own. You offer more help at the start, then gradually withdraw it as students gain confidence and competence, until they can work without it.
The important word there is “temporary”. Scaffolding is help that’s meant to be taken away from the start. Sometimes called instructional scaffolding or educational scaffolding, the whole approach has one purpose: to move students from guided success towards independent learning. The scaffolding process is always the same – more support at the start, less as students grow more able – and once you hold that goal in mind, every decision about instructional scaffolding gets easier.
Where scaffolding comes from
The American psychologist Jerome Bruner coined the term scaffolding in the 1970s, building on the work of the Soviet psychologist Lev Vygotsky. The word comes straight from the building site. When workers put up a new structure, they erect scaffolding around it to hold the work in progress, then take that scaffolding down once the building can stand on its own.

Keep that building-site image in mind, because it’s the part teachers most often forget. A worked example, a writing frame or a set of prompts is there to support the learning while it is still fragile. The moment students can manage the new concept without it, the scaffold has done its job and should start to come away.
The three types of scaffolding in education
Scaffolding strategies are usually grouped into three types, depending on the kind of support they offer. Most of the scaffolding techniques you already use in the classroom fall into at least one of them.
Sensory scaffolding
Sensory scaffolding uses physical and visual aids – manipulatives, diagrams, objects and demonstrations – so students can see or handle a concept rather than only hearing about it. In maths, fraction tiles are a classic example: a child who can see that two \frac{1}{4} tiles cover the same space as one \frac{1}{2} tile will grasp concepts like equivalence faster than one working from numbers alone.
Graphic scaffolding
Graphic scaffolding uses graphic organisers – charts, tables, bar models and templates – to help students organise their thinking and see how ideas connect. By taking care of the structure, a good organiser frees up space for the harder work of reasoning.
Interactive scaffolding
Interactive scaffolding uses talk and collaboration – between teacher and student, or between peers – to support learning. Guided questioning, think-pair-share and structured paired work all sit here. Peer support like this builds critical thinking and keeps students engaged, because talking through problem solving with someone else is one of the best ways students learn to sharpen their thinking.

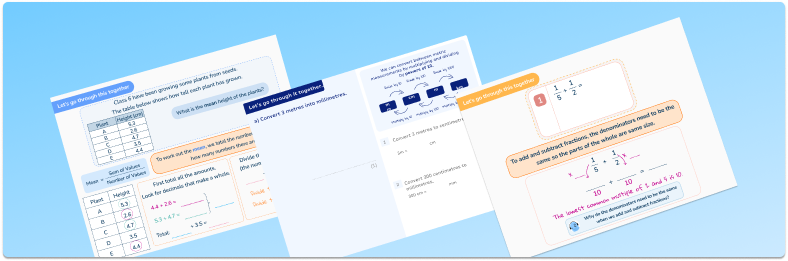
SATs and GCSE AI Tutoring Lessons
A sample of structured and scaffolded teacher-designed AI tutoring lessons from our SATs and GCSE programmes. Includes: 5 GCSE revision lessons, 3 SATs revision lessons and teacher notes, including scaffolding and questioning prompts.
Download Free Now!What scaffolding is not: scaffolding vs intervention
Scaffolding and intervention do different jobs. Intervention happens after a student has shown they have not understood something, so it is reactive. Instructional scaffolding is proactive. It is the support you plan before students show signs of struggle, so the gap never has the chance to open up in the first place.
It also means keeping your expectations high. You change only how much support a student gets and when, while the difficulty of the goal stays exactly the same. Done well, scaffolding lets students reach more challenging learning than they could have managed alone, rather than asking less of them.
Scaffolding vs differentiation
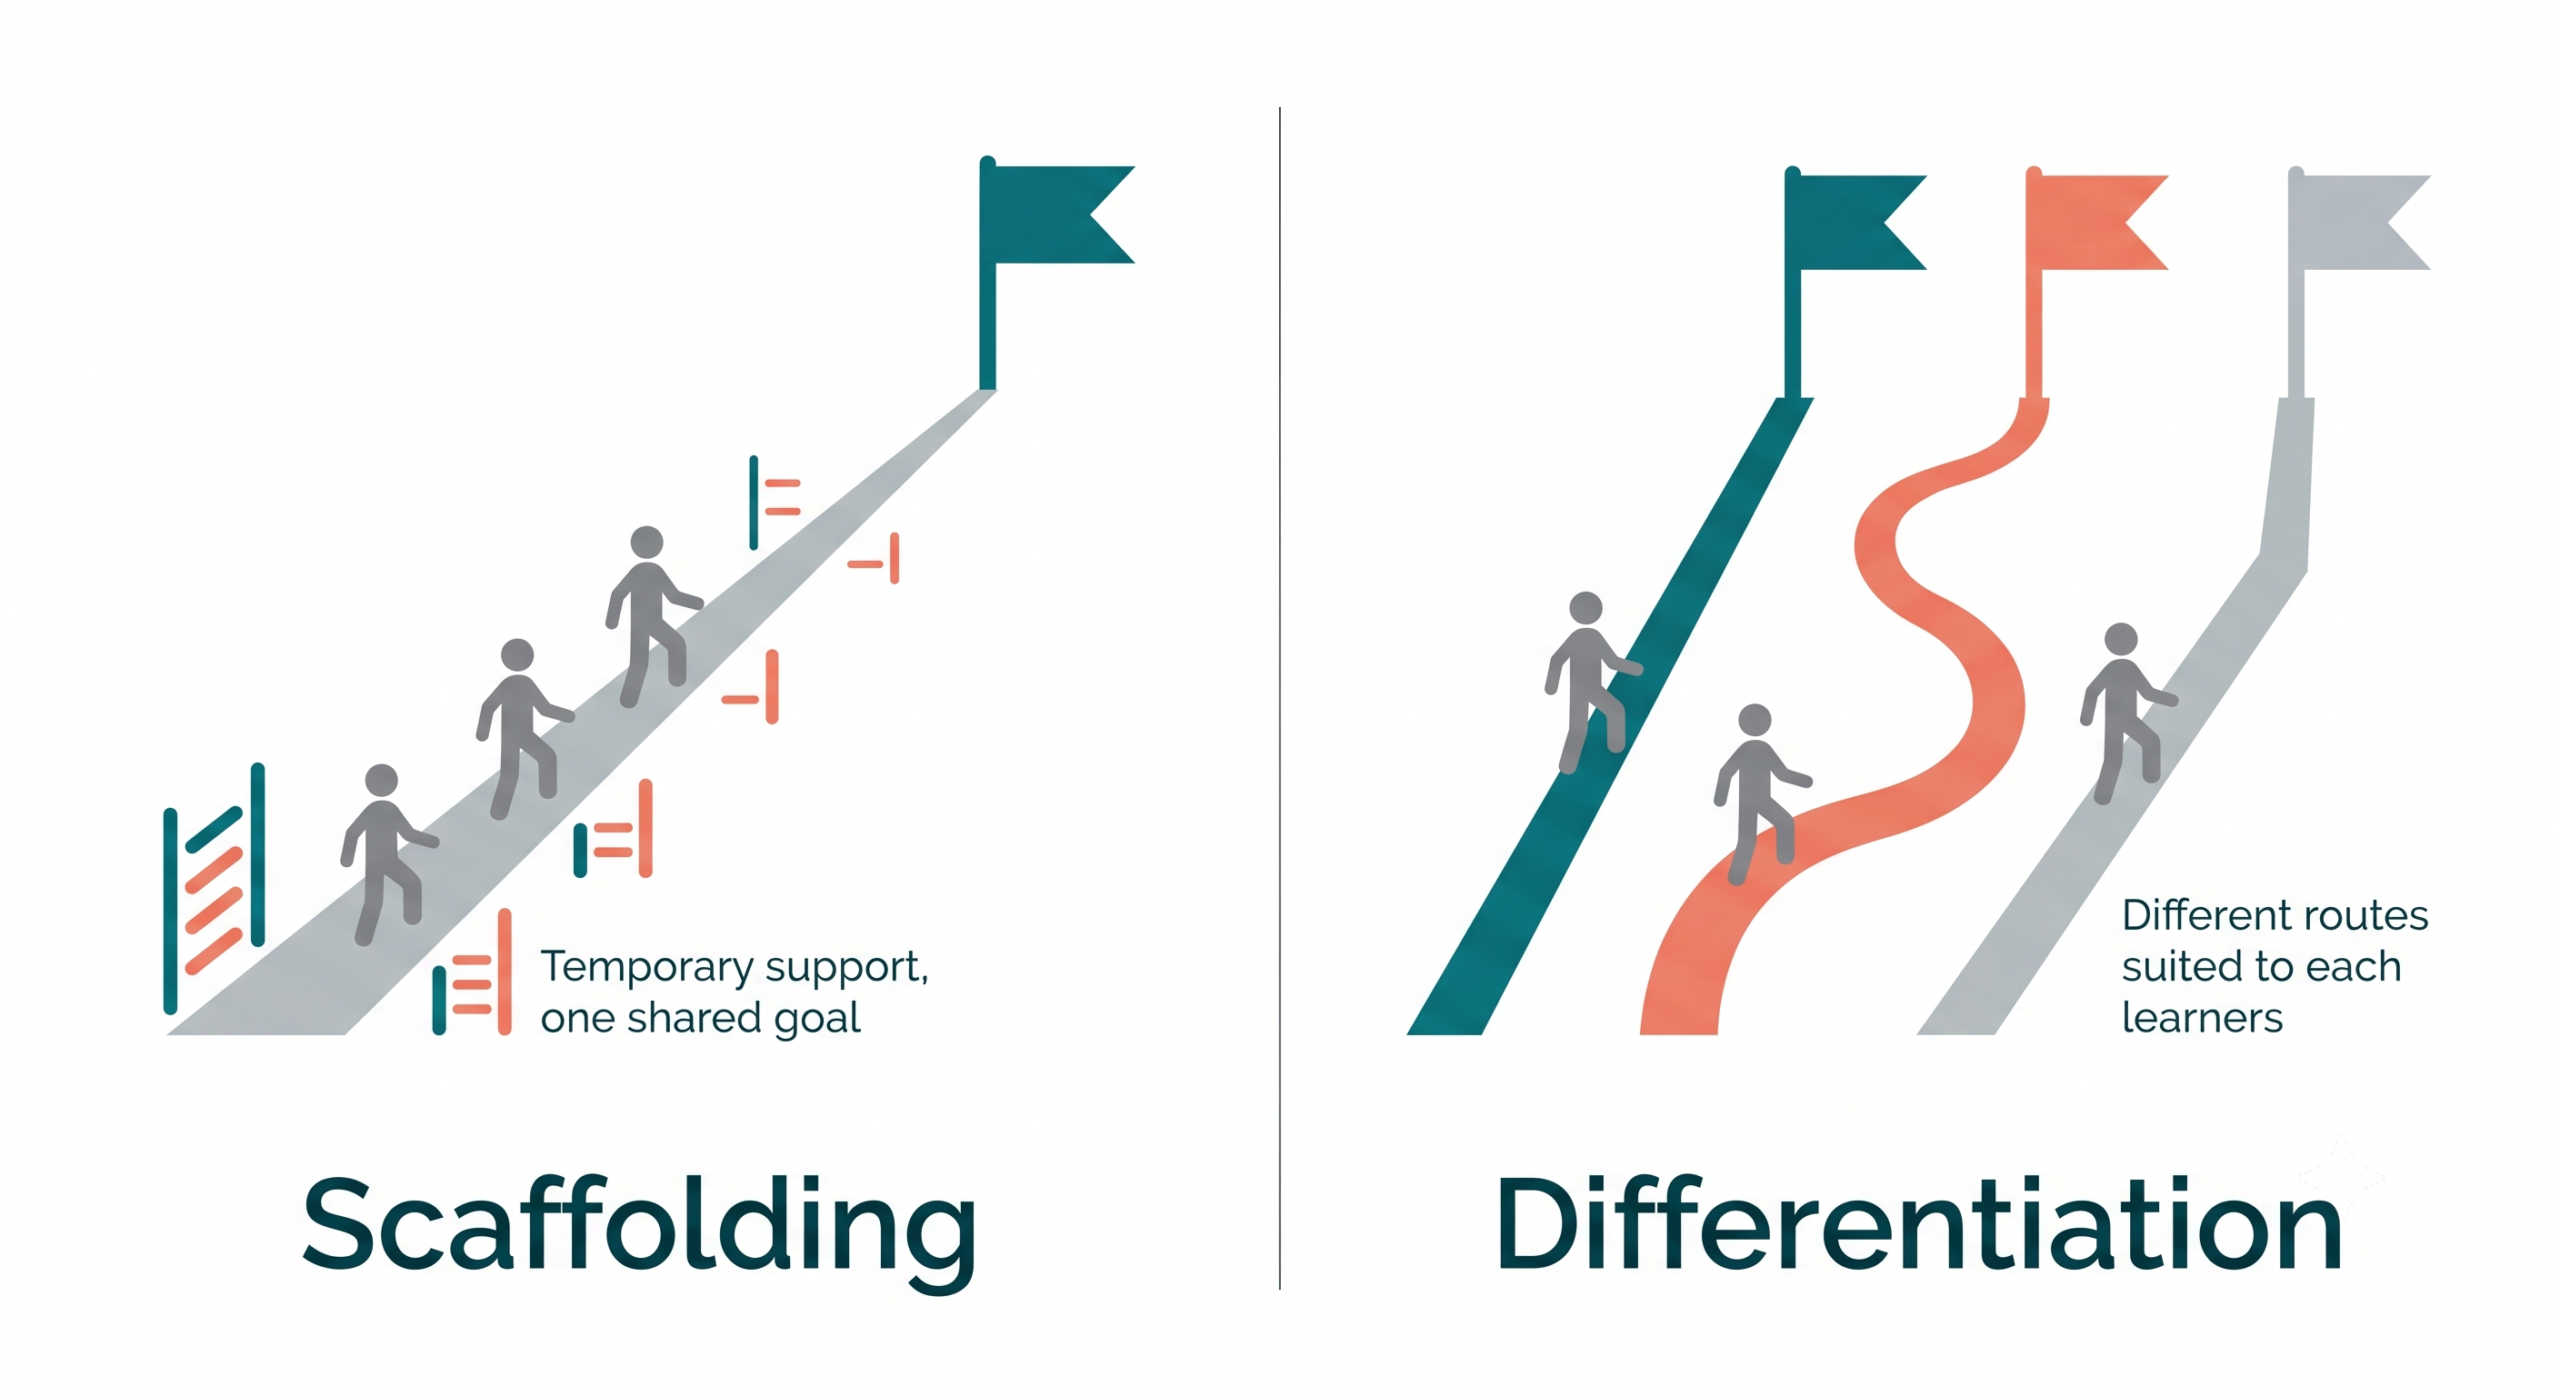
Scaffolding and differentiation are easy to confuse, and plenty of teachers use the words interchangeably. They overlap, but they are not the same thing. Scaffolding is temporary support, gradually removed, that helps every student reach the same goal. Differentiation modifies the task, resource or lesson plans to suit different needs, and can mean different students working towards different goals. The simplest way to tell them apart: scaffolding gets every student to the same goal with temporary help, while differentiation changes the task, or the goal itself, to fit the learner.
Vygotsky, the zone of proximal development and gradual release
We’ve always built our tutoring on Vygotsky, and on the zone of proximal development in particular. That’s not new. But putting it into an AI tutor made us spell out exactly where and how we use it, which is something you never quite have to do when a human teacher is doing it on instinct. Bruner gave us the word scaffolding; the idea underneath it is Vygotsky’s.
What is the zone of proximal development?
The zone of proximal development (often shortened to ZPD) is the gap between what a student can do on their own and what they can do with guidance from a teacher or a more knowledgeable peer. Below the zone sits everything a child can already do unaided; above it sits work that is out of reach even with help. The zone is the sweet spot in between.
Picture a Year 5 pupil – let’s call her Mia – adding fractions with different denominators. Mia can work out \frac{1}{4} + \frac{1}{4} without thinking, but she stalls on \frac{1}{2} + \frac{1}{3}. That second question is sitting right inside her zone of proximal development. On her own, she’s stuck. With a teacher modelling how to find a common denominator, she gets there. Scaffolding practices like this are how you help Mia across that gap. Vygotsky was interested in how guided learning develops a child’s higher psychological processes; Bruner described how to get a learner through the zone. That’s scaffolding theory in practice: support matched to a child’s ability, gradually building independence and taken away as it grows.
Gradual release of responsibility: “I do, we do, you do”
When we were building Skye, the model we kept coming back to was the gradual release of responsibility, better known as “I do, we do, you do”. It’s how you put supportive scaffolding into practice across a whole lesson, handing ownership of the learning process over to a student in three stages, and it’s the structure underneath every lesson we write. It’s worth taking the three stages one at a time, then looking at how Skye uses them.
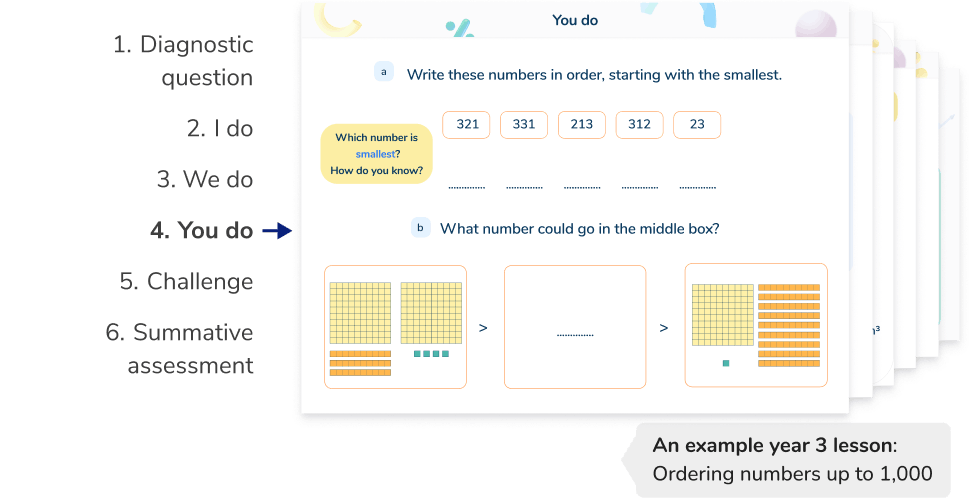
I do: model the method
In the first stage, you take full responsibility. You model the new skill and think aloud as you work, so students can see not only what to do but how an expert reasons through it. Teaching long multiplication, you might work through a calculation like 24 × 16 on the board, talking through every decision as you go: why you multiply by the units first, what each partial product stands for, and where each digit belongs. Nothing is left for the students to infer.
We do: practise it together
In the second stage, you share the work. You tackle similar problems together, with the class suggesting the next step while you question, correct and check that students understand. The scaffolding is still firmly in place, but the students are beginning to lead. They might work through 32 × 14 as a class, with you stepping in only where the method starts to wobble.
You do: hand over to the student
In the third stage, students take full responsibility and practise on their own. You observe and offer support only where it is needed. If your scaffolding has done its job, most students will be ready to work independently and succeed.
The hard part, as every teacher knows, is judging when to move from one stage to the next. If you hand over too early, students struggle. If you leave it too long, they get used to help they no longer need.
Inside a Skye lesson: how every lesson follows “I do, we do, you do”
Every Skye lesson is built on this exact sequence, because it is the structure the most effective teaching uses. The difference is that we have made it deliberate and consistent, so no stage gets skipped.
Each lesson opens with a short diagnostic we call the Skill Check In. A student who already shows secure understanding skips straight to independent practice, so we never waste their time reteaching something they can do. A student who is not yet secure gets the full sequence: Skye models the method first (I do), then works through guided practice, adjusting the support as students respond (we do), before they move on to practise on their own (you do).
Because Skye works one to one, it can hold every student in their own zone of proximal development and adjust in real time, offering more support to those who are not. You are doing this every time you model a method, practise it together, then set the class off alone. We have made that sequence the backbone of every lesson.
7 examples of scaffolding in the classroom
Scaffolding in education comes down to a handful of strategies that support learning and do most of the heavy lifting. These are the scaffolding techniques we lean on most in our own lessons, each with an example and, where it helps, a look at how we’ve built it into Skye. They work in any subject. Our examples are from maths because that’s what Skye teaches, and they’re the scaffolds we developed for it.
1. Activate prior knowledge
New learning has to attach to something. Before you introduce a new concept, spend a few minutes activating what students already know, so the new knowledge connects to their existing knowledge and has somewhere to land.
Before teaching the area of a triangle, for example, recap the area of a rectangle. Once students remember that area is length × width, the step to “a triangle is half a rectangle”, so area = \frac{1}{2} × base × height, feels far smaller than it would from a standing start.
Inside a Skye lesson: the Skill Check In
Every Skye lesson opens with a short diagnostic we call the Skill Check In. Before any new teaching, Skye asks the student to recall what they covered last time, checks what students understand about the topic, and connects it to where it appears in the real world. That quick check does two jobs at once. It wakes up the relevant prior knowledge, and it tells Skye whether to teach the full lesson or move a secure student straight to independent practice.
2. Model with worked examples
A worked example shows students what good looks like before they attempt it themselves. Displayed alongside the problem, a fully worked solution lets students study each step in turn, rather than holding the whole method in their head at once. They are especially powerful for multi-step procedures where it is easy to lose track of the sequence, such as long division like 144 ÷ 12 or converting between fractions, decimals and percentages. Studying the worked solution supports skill acquisition, and returning to it in the next lesson helps students master the method.
Inside a Skye lesson: follow me, your turn
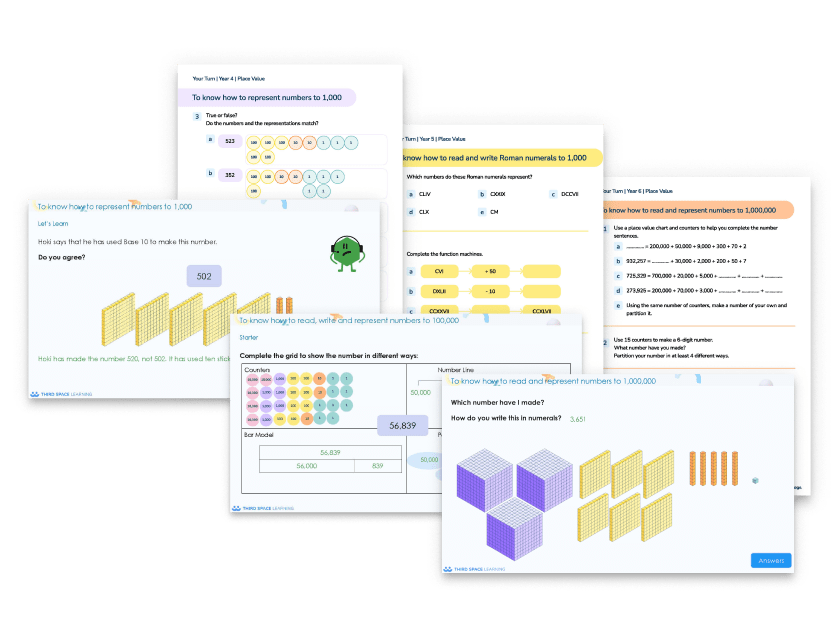
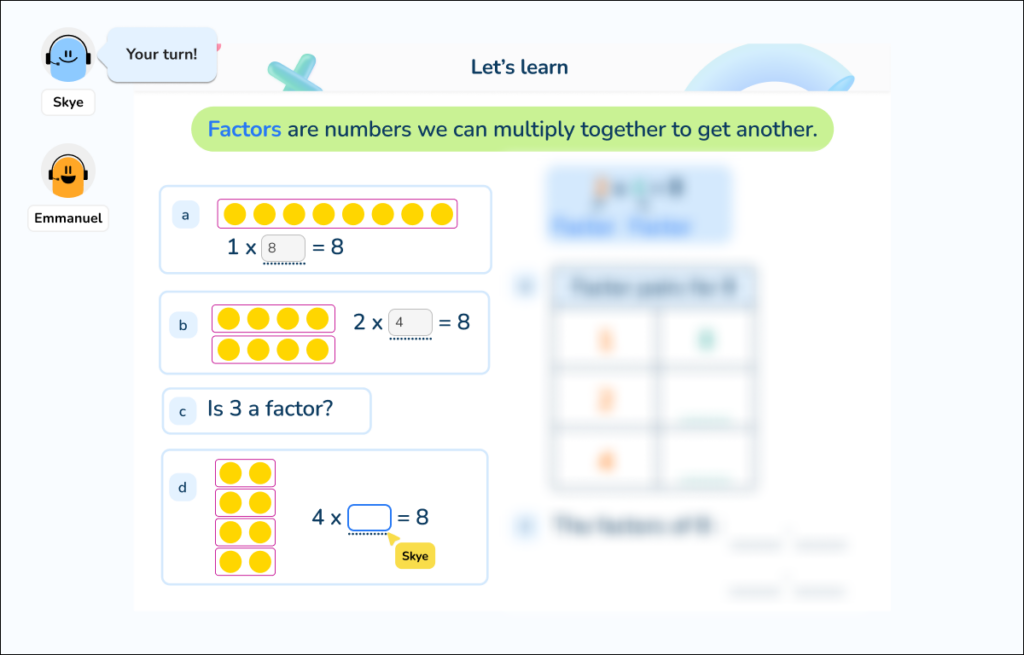
In our lessons, Skye begins a new method on a fully modelled slide, then moves to partly completed examples before students reach independent practice. The worked example is itself a scaffolding tool, and like any scaffold, it’s there to be taken away.
3. Use manipulatives, visual aids and graphic organisers
Some of the most effective scaffolds are visual. Manipulatives such as base ten blocks or fraction tiles let students handle a concept, which is the basis of the concrete pictorial abstract approach used in maths mastery teaching. Graphic organisers such as a bar model or a place value grid give students a ready-made structure for their thinking and their problem solving. A good organiser is a scaffolding tool you can hand over, then take back as students grow more confident.
Inside a Skye lesson: teacher-written lessons
Because Skye teaches through teacher-made slides rather than a blank chat window, every lesson is built around clear visual representations, each one chosen to make the maths easier to see rather than to decorate the screen.
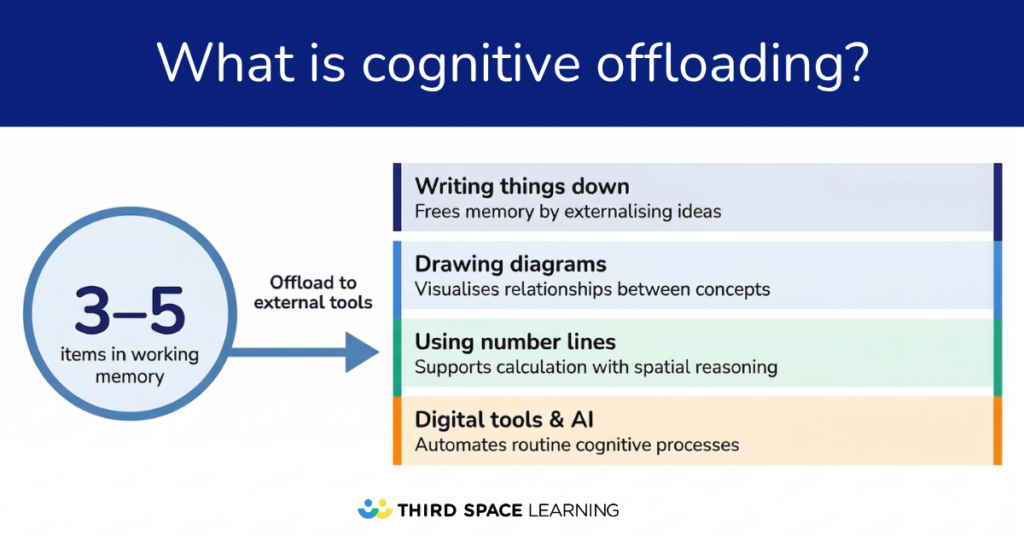
4. Break tasks into smaller steps to manage cognitive load
A task that feels overwhelming as a whole becomes manageable when you break it into smaller steps. Each step is a small win that keeps the learning objectives in reach, and it keeps the demand on a student’s working memory low enough that they can actually think.
Take a multi-step problem: “a coat costs £40, is reduced by 25%, then by a further £5; what is the final price?” Tackled all at once it is daunting. Broken into steps – find 25% of £40, subtract it, then subtract £5 – it becomes a series of calculations a student can already do.
Inside a Skye lesson: one small step at a time
We designed each Skye lesson to cover one small step towards the lesson’s learning objectives, because we know how quickly students are overwhelmed when too much arrives at once. Slides are deliberately uncluttered, showing only what a student needs at that moment, and Skye uses pointer tools and a blur function to grey out anything that is not relevant yet. The student’s attention stays on the single idea in front of them.
5. Pre-teach vocabulary
Unfamiliar words can block a student before the maths even begins. When you pre-teach vocabulary – introducing the key terms and their meanings before the main task – the language stops competing with the concept for a student’s attention. Before a lesson on probability, for instance, make sure students are secure on new vocabulary such as “outcome”, “event” and “likely”, so the new concept is the only hard part. Pre-teaching vocabulary like this is especially valuable in special education settings, and helps you support learners whose language learning is still developing alongside their maths.
Inside a Skye lesson: All new terms are introduced on the slide
Skye teaches through slides built by our teachers, so the key vocabulary for a topic is right there on the slide, where a pupil needs it. And because Skye is spoken, it says each term aloud as it uses it, so pupils hear the word used correctly, not just read it. The more they hear it in context, the less the language gets in the way of the maths.
6. Use guided questioning and talk
Rather than telling a student the answer, guided questioning nudges them towards it: “What do we already know? What are we trying to find?” Good questioning lets you guide students towards an answer while keeping the thinking firmly with them, and it shows you what students understand from how they explain it. Getting students to talk through their reasoning, to a partner or to you, is one of the most reliable ways to deepen understanding and student engagement.
Inside a Skye lesson: listening to spoken reasoning
Skye is not a chatbot. Students talk through their reasoning out loud, and Skye listens, then responds. It asks open-ended questions to guide students rather than yes-or-no ones, and works out what a student understands from how they explain it, not just from whether the final answer is right. Hearing a student talk through their reasoning shows the half-formed new ideas that a tick or a cross would miss.
7. Respond to misconceptions with targeted hints
When a student goes wrong, telling them the right answer rarely fixes the misconception underneath. A better scaffold is a hint – just enough of a nudge for the student to find the error themselves and understand why it was an error. It’s instructional scaffolding at its most useful: aimed at the actual misconception, not a generic prompt.
Inside a Skye lesson: two hints and a modelled answer
We built Skye to respond to a wrong answer the way a good tutor would. The first incorrect attempt earns a hint. A second prompts more explicit scaffolding. On the third, Skye models the correct approach step by step. Every one of those hints was written by a teacher on our team, drawn from the misconceptions we see again and again in real lessons, so the support meets the actual error rather than offering a generic prompt.
How to know when to take the scaffolding away
Putting scaffolding up is the easy part. Knowing when to take the support away is what teachers find hardest. Scaffolding only works if it eventually comes away. Support that never comes down stops being a scaffold; the student just leans on it, and never finds out what they can do on their own.
One of the surest ways to tell is to ask. A quick diagnostic question – one that shows you what a student can already do – tells you whether they still need the scaffold or are ready to manage without it. Use it at the start to gauge how much support to put in, then again as the lesson goes on to see when a student is ready for less. It’s the same job Skye’s Skill Check In does at the start of every lesson, though a couple of well-chosen questions on a mini-whiteboard do it just as well.
Plan for the scaffold to come down from the start
The best moment to decide how a scaffold will come down is the moment you put it up. When you plan a lesson, set out the learning goals and plan the fade as well: a fully worked example first, then a partly completed one, then a version with only prompts, then nothing at all. If you already know what the next step down looks like, you are far less likely to leave a scaffold in place out of habit, and the whole scaffolding process stays under your control. Effective teachers plan these scaffolding strategies from the outset, gradually withdrawing support as each student grows more able.
This is also where you protect your high expectations. Removing support hands the same work back to the student, one piece at a time, with the learning goals unchanged, until it is entirely theirs. The work stays exactly as demanding; the student simply takes on more of it.
The signs a student is ready for more independence
Knowing when a child is ready for less support is not something you can make a rule for. Each child is different and it can be quite nuanced. Some of the signs to look for are a pupil completing the independent practice without being prompted, explaining their reasoning before you ask, starting to take charge of their own learning, or helping the child sitting next to them. When you start to see these, you can ease the support back.
It’s easy to get the timing wrong in either direction, so most teachers are making small adjustments here all the time – easing the support back, then adding it again if a child needs it. Most teachers are making small adjustments here all the time, easing the support back and being ready to add it again if a child needs it.
It’s also one of the harder things to get right, which is a big part of why we designed Skye the way we did. Because Skye works with one child at a time, it looks for the same signs a teacher would, and adjusts as it goes. If a pupil is secure, Skye moves them straight on to the independent practice. If they’re struggling, it adds the support back. It’s the same thing a teacher does in class, just with one child at a time.
Why effective scaffolding needs human expertise
Every part of scaffolding in education works in any classroom, with or without technology. But none of it runs on autopilot. Good scaffolding depends on judgement – knowing which strategy a particular child needs, and when to take it away – and that judgement comes from years of experience in the classroom. It is the one part an AI tutor cannot generate for itself.
Built by teachers, refined across millions of lessons
That is exactly why we built Skye the way we did. Every lesson, every worked example and every hint was written by qualified teachers on our team, drawing on more than ten years of one-to-one tutoring across more than 4,200 schools and 2.1 million lessons. Every scaffold a student meets in a Skye session was written in advance by teachers who know where children get stuck on a topic, and what kind of nudge gets them going again. It is built to support teachers and to provide students with help that meets them where they are.
An AI tutor can run that scaffolding process consistently and at scale, but it cannot decide, on its own, when to introduce a topic, how deeply to go, or which misconception a particular wrong answer reveals. Those are judgements that come from having taught, and they have to be designed in by people who have. We keep refining them, too. When a teacher or a student flags a confusing explanation or a hint that misses, our team rewrites it, so students benefit and the next child in that position gets better support.
Implementing scaffolding in your classroom
You do not need an AI tutor to put any of this into practice. The principles are the same at a desk with a mini-whiteboard as they are in a Skye session: activate what students already know, model clearly, break the work into steps, question rather than tell, scaffold to the specific misconception, and plan from the start for the support to come down.
What we’ve seen, across millions of lessons, is that scaffolding done well is deliberate. Used consistently, it helps students take ownership of their learning, reaches diverse learners and pupils in special education, and connects maths to their own lives. The teachers who get the most from it are not improvising in the moment so much as planning where the support goes in, and where it comes out, before the lesson begins. That’s the habit worth building, whether you’re teaching a whole class or sitting with one child.
Frequently asked questions
Scaffolding in teaching is the support a teacher gives students to help them complete a task or understand a concept they could not yet manage on their own. The support is gradually removed as students gain confidence until they can work independently. It is sometimes called instructional scaffolding.
A common example is modelling a worked example: a teacher solves a problem step by step, thinking aloud, before students attempt similar problems themselves, first together and then alone. Other scaffolding strategies include activating prior knowledge, pre-teaching vocabulary, using graphic organisers such as bar models, and giving targeted hints that help a student find their own mistake rather than correcting it for them.
Vygotsky‘s idea grows out of his concept of the zone a learner can reach with guidance – the gap between what a student can do alone and what they can do with help from a teacher. Scaffolding is the support that helps a student work across that gap. Jerome Bruner later coined the term scaffolding to describe it.
The three types are sensory scaffolding (physical and visual support such as manipulatives and diagrams), graphic scaffolding (graphic organisers, charts and templates), and interactive scaffolding (talk and questioning between teacher and student, or between peers).

DO YOU HAVE STUDENTS WHO NEED MORE SUPPORT IN MATHS?
Skye – our AI maths tutor built by teachers – gives students personalised one-to-one lessons that address learning gaps and build confidence.
Since 2013 we’ve taught over 2 million hours of maths lessons to more than 170,000 students to help them become fluent, able mathematicians.
Explore our AI maths tutoring or find out about school tutors for your school.